The Human Algorithm/How to Get Claude Code Running in Your Terminal (No Coding Needed)
The Human Algorithm • WednesdayHow to Get Claude Code Running in Your Terminal (No Coding Needed)
I went to school for tech, so the terminal has never been the scary part for me. But I know what "just run it in the terminal" sounds like from the outside. Fifteen minutes, every command for Windows and Mac, and the exact output you should see at each step.

I went to school for tech, so the terminal has never been the scary part for me. I have been around computers my whole life. Now a real amount of the business ends up running inside that window: the automations, the apps I ship.
But I know what “just run it in the terminal” sounds like from the outside. A black screen with a blinking cursor, no buttons, no undo, and a strong sense that you are one typo away from breaking something expensive. This tutorial is for that person.
Fifteen minutes, most of it waiting for an installer. The desktop chat apps are fine for questions. The terminal version can open your folders and do the work with you, which is a different job entirely.
By the end of this tutorial you will have Claude Code installed and talking to a real folder on your computer. Set aside 15 minutes. Here is what “working” looks like, so you know what you are walking toward:
> what files are in this folder and what do they do?

⏺ This folder has 3 files:
  - index.html: the structure of your page
  - style.css: colors, fonts, spacing
  - script.js: the button click behavior
You type a question in plain English. It reads your actual files and answers. That is the whole trick.
What you need
- A computer running Windows 10 or 11, or a Mac. I am on Windows, and every step below shows both.
- A Claude account, the same login you use at claude.ai. The Pro plan covers Claude Code.
- A terminal, which you already have. Windows: press the Windows key, type powershell, press Enter. Mac: press Cmd + Space, type terminal, press Enter. That window is the terminal. You are in.
No code editor. No programming knowledge. If you can type a sentence, you are qualified.
Step 1: Install Node.js
Claude Code rides on Node.js, a free tool that lets programs like this run on your machine. You install it once and forget it exists.
First check whether you already have it. In your terminal, type:
node --versionYou should see: something like this.
v22.14.0Any number that starts with v18 or higher is fine. If you got a number, skip to Step 2.
If you got an error instead (“not recognized” on Windows, “command not found” on Mac), go to nodejs.org and click the big green Get Node.js® button.
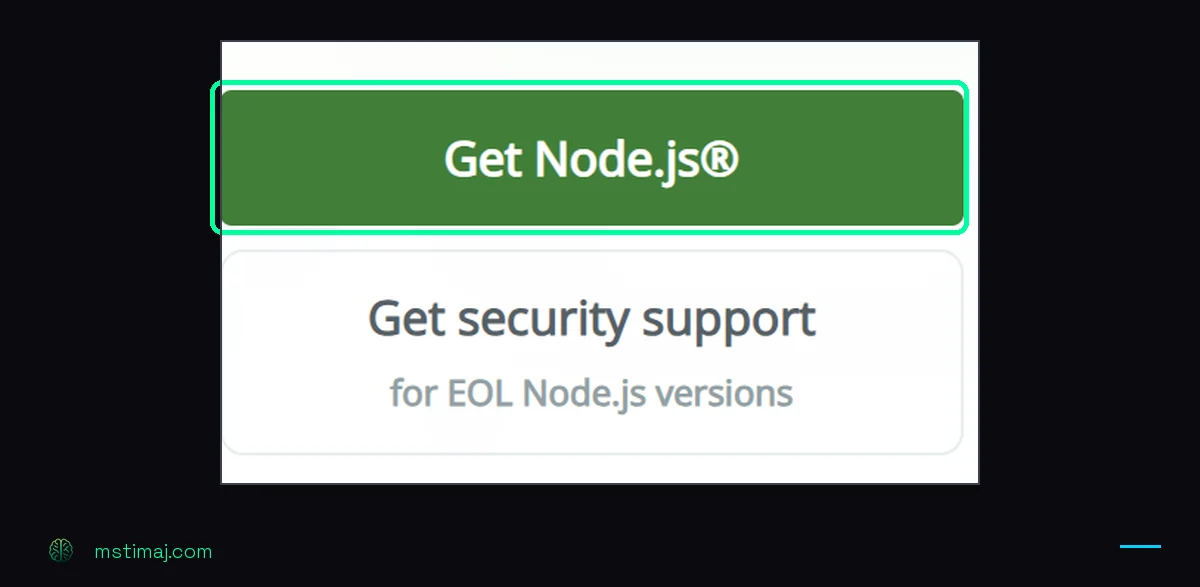
That link goes to the download page, which opens on Docker instructions. Docker is a different tool and you do not need it. Ignore that whole block, scroll to the line beginning “Or get a prebuilt Node.js”, and click Windows Installer (.msi). On a Mac, switch the operating system dropdown on that page to macOS first, then take the installer it offers.
Run the file you downloaded. Click Next through every screen, because the defaults are correct. When it finishes, close your terminal completely, open a new one, and run the check again.
Once you see a version number, Node is done and you never think about it again.
Step 2: Install Claude Code
One command downloads and installs the whole tool. Same command on Windows and Mac:
npm install -g @anthropic-ai/claude-codeThe -g means “global,” so it works from any folder on your computer, not just the one you are standing in.
You should see: a short pause, maybe a progress bar, then:
added 2 packages in 4sThe number of packages and seconds will vary. What matters is the word “added” and no red text. Confirm it landed:
claude --versionYou should see:
2.1.221 (Claude Code)Your version number will be higher by the time you read this. That is fine.
Installed is not the same as useful, though. Next you give it something to look at.
Step 3: Point it at a folder
Claude Code works inside a folder you choose, and it can only see that folder. So give it one.
Make a practice folder first. You can do this in the terminal too.
Windows:
mkdir $HOME\Desktop\claude-test
cd $HOME\Desktop\claude-test
Mac:
mkdir ~/Desktop/claude-test
cd ~/Desktop/claude-test
mkdir makes the folder, cd steps into it. Replace claude-test with any name you like, no spaces.
You should see: almost nothing. The line in front of your cursor now ends with the folder name:
PS C:\Users\You\Desktop\claude-test>Errors are loud. Success is usually silence.
Later, when you want Claude Code in a folder you actually work in, your website files or your content drafts, you will cd into that folder the same way before starting it. So it is worth knowing four things about cd, because this is the command you will use every single time.
cd takes a path. You can hand it a full one:
cd $HOME\Documents$HOME is a shortcut for your user folder, so you do not have to type C:\Users\YourName every time. On a Mac the shortcut is ~ instead, so that line is cd ~/Documents.
Two dots take you back up one level:
cd ..And if the folder name has spaces in it, which most real folders do, wrap the whole path in quotes:
cd "$HOME\Desktop\Client Work"Leave the quotes off and Windows gives you this, which stops a lot of people cold:
Set-Location : A positional parameter cannot be found that accepts argument 'Work'.A Mac phrases that complaint differently, but the cause and the cure are the same. Quote the path.
The fastest way to avoid typing any path at all: type cd, then a space, then drag the folder from File Explorer or Finder straight into the terminal window. The full path drops itself in. If it lands without quotes and the folder name has spaces, put quotes around it, then press Enter.
It is worth more than it sounds. It means you never have to know where a folder lives to point Claude Code at it.
Step 4: Start it and sign in
Now the payoff. From inside your folder, type:
claudeThe very first launch asks you to log in. It opens your browser, you sign in with your regular Claude account, click Authorize, and come back to the terminal. You do this once. Every launch after that skips it.
If a browser page did not open on its own, the terminal prints a link. Copy it into your browser and log in there.
Then it asks you a question.
You should see:
Accessing workspace:

C:\Users\You\Desktop\claude-test

Quick safety check: Is this a project you created or one you trust?
(Like your own code, a well-known open source project, or work from
your team). If not, take a moment to review what's in this folder first.

Claude Code'll be able to read, edit, and execute files here.

> 1. Yes, I trust this folder
  2. No, exit
Claude Code is confirming you meant to point it here. You made this folder a minute ago, so press 1.
Read the path before you answer, every time. It is the one screen between the agent and a folder you did not mean to hand over. Answer 2 and it exits without touching a thing.
Then the welcome box draws:
╭─── Claude Code v2.1.221 ─────────────────────────────╮
│                                                      │
│  ▐▛███▜▌   Welcome back!                             │
│ ▝▜█████▛▘                                            │
│   ▘▘ ▝▝    ~\Desktop\claude-test                     │
│                                                      │
╰──────────────────────────────────────────────────────╯

> Try "fix lint errors"
Your version number and the suggestions will differ. What matters is the box, the folder path sitting inside it, and the > waiting at the bottom.
You are in. Now find out whether any of this was worth fifteen minutes.
Step 5: Ask it something real
Your folder is empty, so have it make something. At the Claude Code prompt, type this and press Enter:
make a file called hello.txt that says hi from my terminalYou should see: Claude Code propose the file and ask for your permission before it touches anything:
⏺ Create(hello.txt)
  Do you want to create hello.txt?
  ❯ 1. Yes
    2. Yes, allow all edits during this session
    3. No, and tell Claude what to do differently
Press 1. Then look at your Desktop folder in the normal way, File Explorer or Finder. There is a real file sitting there. You made a file by describing it.
It scales further than it looks. The same move that made a text file will rename a folder of client photos by date, or draft a dozen product descriptions off a spreadsheet. Describe the outcome, approve the steps.
The permission prompt is the safety net. Nothing gets created or deleted without you saying yes first.
To leave Claude Code at any point, type /exit or press Ctrl + C.
Setup done. If any of it went sideways, the next section is where I keep the fixes.
If something looks wrong
Three things that go wrong here. The first two I hit myself on Windows. The third is the Mac one, and I am passing it on rather than claiming it: I work on Windows, so I have not run into it personally.
“npm is not recognized” (Windows) or “command not found: npm” (Mac). The terminal cannot find Node. Either it is not installed, so go back to Step 1, or you installed it and kept using the old terminal window. Close the terminal fully, open a fresh one, try again. The new window picks up the new tools.
“claude.ps1 cannot be loaded because running scripts is disabled on this system” (Windows). PowerShell ships locked down. Run this once:
Set-ExecutionPolicy -ExecutionPolicy RemoteSigned -Scope CurrentUserAnswer Y, open a new terminal, and claude works. This setting allows properly published tools to run.
“command not found: claude” (Mac, right after installing). npm put the tool somewhere your terminal is not looking. Run npm config get prefix. If it prints something like /usr/local, close the terminal and reopen it. Still broken? Run the install again as sudo npm install -g @anthropic-ai/claude-code and type your Mac password when asked.
What you just built
You have a working AI agent on your own machine that can see the folders you point it at and asks permission before changing anything. You installed it with two commands and you can start it anywhere with one word.
Try this next: cd into a folder you actually use, maybe the one with your resume or your content drafts, start claude, and ask “what’s in here and what’s out of date?” That answer is the first genuinely useful thing it will tell you.
One thing you will run into fast, once you start using it on real folders: Claude Code reads a file called CLAUDE.md if it finds one sitting in the folder. That file is where you tell it how you work. What the project is and what you never want it touching. Mine is the reason it writes in my voice instead of a generic one. You do not need it today, and an empty folder does not miss it.
Next Wednesday is the one on CLAUDE.md itself: what belongs in it, and what quietly makes it worse.
Comments
No comments yet. Yours can be the first.